
The Ultimate No-Churn Vanilla & Chocolate Swirl Ice Cream
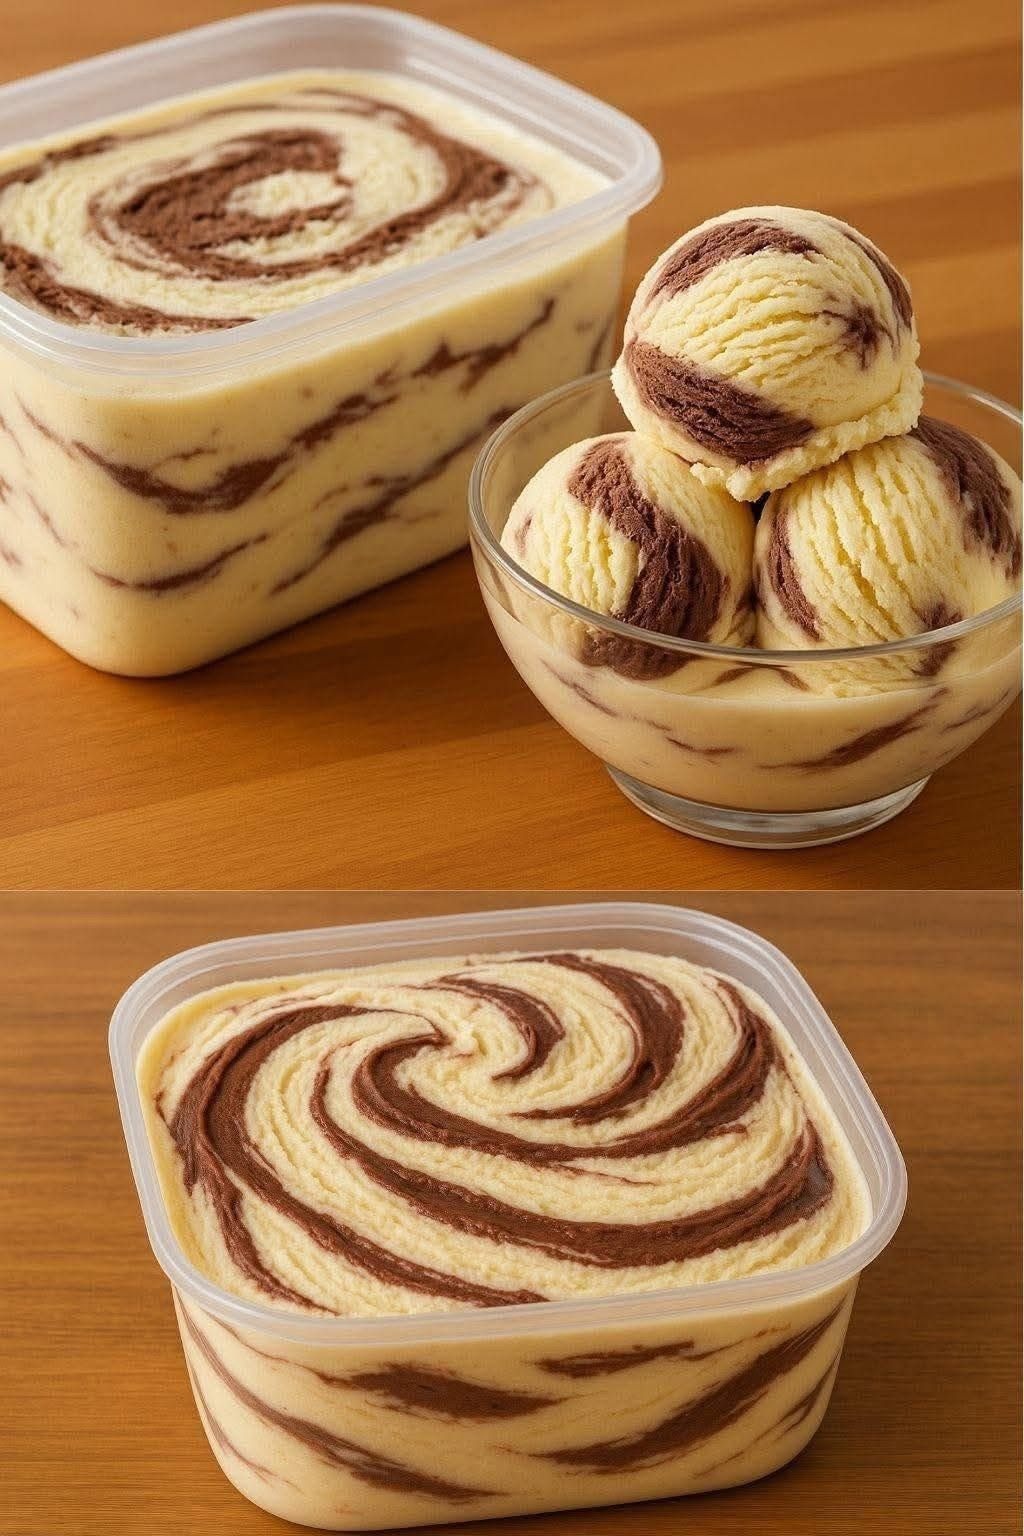
Homemade ice cream is the ultimate summer luxury, and nothing beats the visual appeal and taste contrast of a classic Vanilla & Chocolate Swirl (often called Marble or Ribbon ice cream). This recipe delivers a velvety, scoopable texture without requiring an expensive ice cream maker. By mastering a simple whipping technique, you can recreate the gorgeous, high-contrast ripples shown in your image right in your own kitchen.
Ingredients Breakdown
To achieve a creamy mouthfeel that doesn’t turn into a block of hard ice, we use a balance of high-fat dairy and sugar, which lowers the freezing point.
1. The Creamy Base
- 2 cups (480ml) Heavy Whipping Cream: Must be cold (at least 36% milk fat) to trap air and create structure.
- 1 can (14 ounces / 400g) Sweetened Condensed Milk: This provides sweetness and acts as the softener so the ice cream stays scoopable.
- 1.5 teaspoons Pure Vanilla Extract: Gives the bright background base its rich flavor.
- A pinch of Fine Salt: Balances the intense sweetness of the condensed milk.
2. The Chocolate Swirl Paste
- 0.5 cup (50g) Unsweetened Cocoa Powder: High-quality Dutch-processed cocoa gives the deepest color and richest flavor.
- 0.25 cup (60ml) Warm Water or Whole Milk: To dissolve the cocoa into a smooth paste.
- 3 tablespoons Powdered Sugar: To sweeten the chocolate layer slightly so it isn’t bitter.
Chef’s Kitchen Metrics
| Parameter | Value / Detail |
|---|---|
| Prep Time | 20 Minutes |
| Freeze Time | 6 Hours (Minimum) |
| Yield | Approx. 1.5 Quarts (1.4 Liters) |
| Difficulty | Easy |
| Storage Container | 2-Quart Airtight Plastic Tupperware (as pictured) |
Step-by-Step Instructions
Step 1: Prepare the Chocolate Swirl Paste
- In a small bowl, whisk together the unsweetened cocoa powder, powdered sugar, and warm water (or milk).
- Stir vigorously until it forms a thick, smooth, and glossy chocolate paste. It should have the consistency of warm hot fudge. Set it aside to cool completely to room temperature.
Step 2: Make the Vanilla Base
- In a large, chilled mixing bowl, pour in the cold heavy whipping cream.
- Using an electric hand mixer or a stand mixer fitted with the whisk attachment, beat the cream on medium-high speed until stiff peaks form (roughly 3 to 4 minutes). Be careful not to over-whip, or it will turn into butter.
- In a separate medium bowl, combine the sweetened condensed milk, vanilla extract, and a pinch of salt. Mix well.
- Gently fold a third of the whipped cream into the condensed milk mixture to lighten it up. Then, pour everything back into the main bowl with the remaining whipped cream. Use a rubber spatula to fold gently in a figure-eight motion until completely combined and fluffy.
Step 3: Layering and Creating the Swirl Effect
To get the perfect marbled pattern visible on both the sides and the top of the container, follow this layering technique:
- Take your clean plastic container and spread about one-third of the vanilla ice cream base evenly across the bottom.
- Drizzle one-third of your chocolate paste in random zig-zag lines over the vanilla layer.
- Repeat this process two more times: add another layer of vanilla, drizzle chocolate, add the final layer of vanilla, and drizzle the remaining chocolate on top.
- The Swirl Technique: Take a butter knife, a skewer, or the handle of a spoon. Insert it vertically all the way to the bottom of the container. Gently drag it through the layers in a steady S-shaped or spiral motion across the entire container. Do this only 2 or 3 times. Do not over-mix, or the layers will blend together and turn into a solid light-brown chocolate ice cream.
Step 4: Freezing
- Securely snap the airtight lid onto your plastic container (or cover tightly with plastic wrap pressed directly against the surface of the ice cream to prevent ice crystals from forming).
- Place the container flat in the coldest part of your freezer for at least 6 hours, or ideally overnight, until perfectly firm and ready to scoop.
Pro-Tips for Perfect Ice Cream
- Chill the Tools: Pop your mixing bowl and beaters into the freezer for 15 minutes before whipping the heavy cream. Cold tools help the cream whip up faster and hold more volume.
- Easy Scooping: Because this recipe contains no artificial stabilizers, let the container sit on the counter for 3 to 5 minutes before scooping. This softens the fats slightly, giving you those clean, beautifully textured round scoops shown in the glass bowl.